Settings for navigation
Saving a location
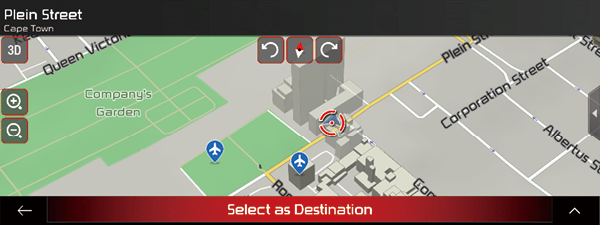
To add any location to the saved locations (the list of frequently used destinations), perform the following steps:
- Select a destination as described before.
It can be an address, a place, any location on the map, a previously used destination from history, and so on.
- When the map appears with the selected location in the middle, press [
 ].
].
|
|
- Press [Save Location]. Using the keyboard, you can change the name offered for the Saved Location.
|
|
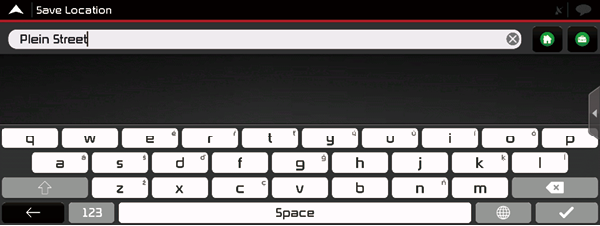
- Press [
 ] to save the location
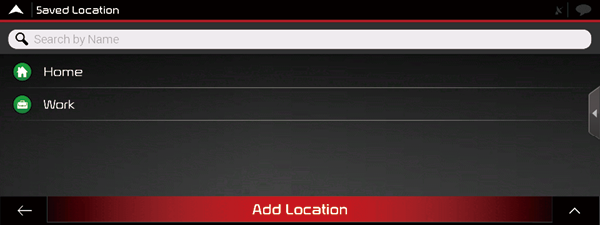
To add your home and work address to the saved locations, perform the following steps:
- On the navigation view, press [
 ] > [New Route] > [Saved Location].
 - Press [Home] or [Work].
Press [OK] to confirm your selection.
Editing a saved location
To edit a location that you have already added as a Saved Location, perform the following steps:
- On the navigation view, press [
 ] > [New Route] > [Saved Location].
The list of Saved locations is displayed.
|
|
- Press [
 ] > [Edit].
 - Press the location you want to edit, press [Rename] and enter the name of the location on the keyboard.
- Press [
 ] > [Done].
Adding an alert point
You can save any map location as an alert point, for example a speed camera or a school zone.
Before using alert point, you have to set the [Alert Point Warnings] in the settings.
- In the navigation view, select the alert point. The red cursor [
 ] appears there.
 - Press [
 ].
].
|
|
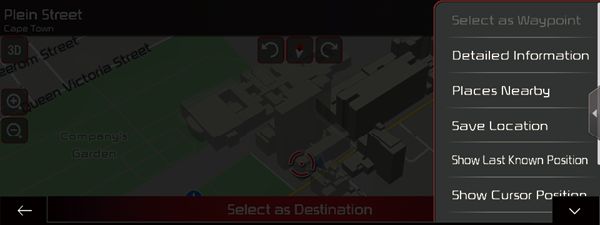
- Scroll down the list and press [Add Alert Point].
- Select the type of the alert point, the direction from which you expect the alert, and (if applicable) the speed limit for this alert point.
- Press [Save] to save the location as a new alert point.
Off-road navigation
This navigation calculates routes using the road network of the maps provided with the product.
Switching to off-road navigation
- On the navigation view, press [
 ] > [Settings] > [Route Preferences].
 - Press [Navigation Mode] > [Off-road].
Selecting the destination in offroad mode
Selecting a destination (waypoint or final destination) is the same as described in the previous sections. The only difference is that route points are linked to form a route with straight lines regardless of the road network and traffic regulations.
Useful information menu
The Useful Information menu provides various additional functions. It can be found in the navigation menu.
|
|
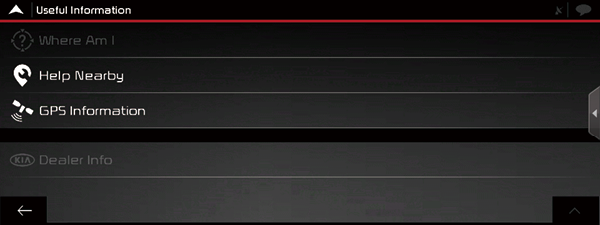
- [Where Am I]: Shows information on the current position (latitude, longitude, nearest town, next crossing street, and so on) or the last known position if GPS reception is not available.
- [Help Nearby]: Offers assistance near your current position.
- [GPS Information]: Shows the GPS Information screen with satellite position and signal strength information.
- [Dealer Info]: Shows a list of nearby dealership and service locations.
Settings menu
You can configure the navigation settings and modify the behaviour of the navigation, by pressing [ ] > [Settings].
|
|
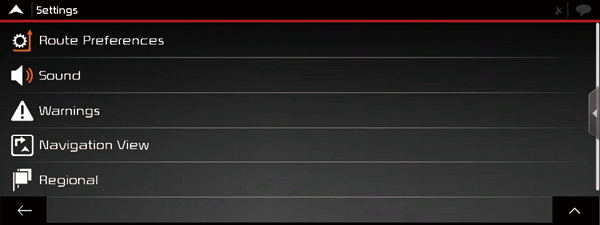
- [Route Preferences]: Select the road types used in route planning, the route planning method and road types for the route.
- [Sound]: Adjust the different sound volumes. [Master], [Voice], [Alerts], [Ding], [Voice Guidance,Early Indication of Maneuvers] and [Verbosity Level].
- [Warnings]: Enable and set up warnings for speed limit, alert points (such as speed cameras) and road signs.
- [Navigation View]: Fine-tune the appearance of the Navigation view or adjust how the software helps you navigate with different kinds of routerelated information on the navigation view.
- [Regional]: Change the voice guidance language, the measurement units, the date, and formats, and customise the application for your local language.